Struggling with the WordPress installation process? Don’t worry; I’ve got you covered with comprehensive guides on various methods available.
By the end of this WordPress installation guide, you’ll have a fully functional site, ready to showcase your content.
Why the need for different installation methods? The answer is straightforward—WordPress’s widespread popularity has led to the development of various helper tools, streamlining the installation process across different servers and hosts. Consequently, you’re not limited to a single method but have multiple alternatives.
This post provides step-by-step tutorials for each common method, ranging from the easiest to the most time-consuming, offering guidance to help you choose the approach that suits you best.
Installation methods differ only in that some processes will occur automatically or you will do them yourself. There are only 3 main installation steps:
– Unzip the file and upload it to the public_html (or similar) directory – Create MySQL Database and User – Configure the wp-config.php file.
And there are 2 options how to do this.
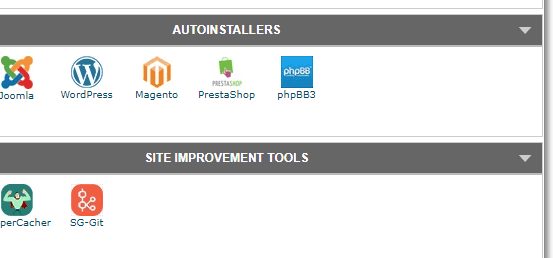
1. How to install WordPress via cPanel and autoinstallers
cPanel serves as the hosting management dashboard provided by most web hosts to their customers. Upon signing up for hosting, your host will furnish you with cPanel login details. Though the appearance of the cPanel interface may vary slightly, the fundamental layout remains consistent.
Within your cPanel interface, your host typically grants access to one or more autoinstallers, simplifying the process of installing WordPress. These autoinstallers streamline the WordPress installation, automating the steps outlined in the subsequent section. Instead of manual execution, you only need to input basic details, click a button, and the autoinstaller handles the WordPress installation.
In certain cases, your host might provide a proprietary WordPress installer tool, offering an alternative method for WordPress installation on cPanel.
Despite minor interface distinctions, all autoinstallers essentially operate in a similar manner.
To commence, locate the link to the WordPress autoinstaller in cPanel and give it a click:
On the next screen, you should see an Install Now link (no matter which autoinstaller you’re using). Just give that another click.
Next, you will input information for your WordPress installation. This interface should appear similar regardless of the autoinstaller you are utilizing.
Begin by entering the protocol and domain name where you intend to install WordPress.
If you have an SSL certificate in place, opt for HTTPS; otherwise, select HTTP. Unless you intentionally installed an SSL Certificate, the default is HTTP.
Following that, pick the directory for your WordPress installation. In most cases (99%), it’s advisable to keep this field empty. An empty field signifies that WordPress will be installed at your primary domain. For instance, if your domain is YOURDOMAIN.com.
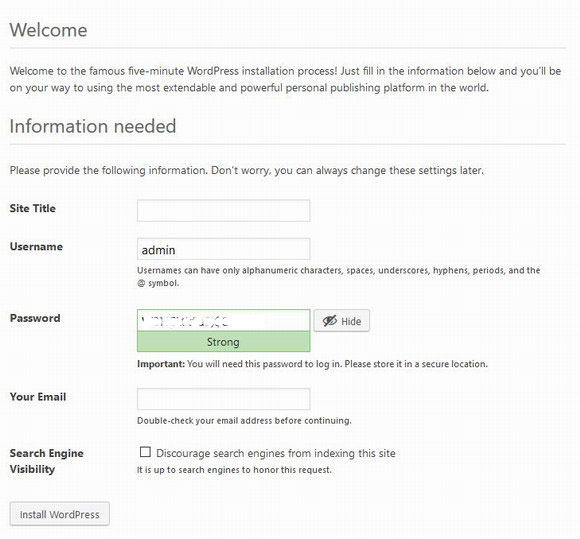
In the next step, you need to fill out the name and description fields for your site. You can always change them later from the WordPress interface.
WordPress will ask you the database details and write them to a new wp-config.php file.
Additionally, you must generate login credentials for your WordPress account. This username/password pair will be your access key to the WordPress dashboard post-installation, so it’s crucial to remember it.
If you successfully install the WordPress, login prompt will be displayed.
2. How to install WordPress manually via FTP
Almost every web host provides a tool to install WordPress from the hosting dashboard. However, if you prefer a manual installation process, continue reading. For beginners, the autoinstaller outlined above is recommended.
To execute the renowned WordPress 5-minute install, you’ll need an FTP program for file upload. Start by downloading the latest WordPress version from wordpress.org, unzip the file, and upload it to the public_html directory on your website.
While the files are copying, access your cPanel account and locate the MySQL Databases option. Create a new database by entering a name and clicking Create Database. Remember the name for future reference.
Create a user for the database by scrolling down to MySQL Users on the same page. After creating the user, ensure it has access to the database.
Once the files are copied, open your browser and enter your domain name to initiate the installation process. The WordPress installation wizard should appear. Select your preferred language.
Ensure you have the database name, user, and password details on hand. Enter them when prompted.
If all goes well, you can proceed with the WordPress installation. Provide a title for your site, enter the necessary information for your admin account, and click Install WordPress.