

Downloading and installing Underscores
Once WordPress is installed and ready to use, we can download and customize the Underscores skeleton theme. It was specifically created to be used as a starting theme for developing your own.
You can download Underscores on the official website http://underscores.me/, you can leave the settings as they are or create a description in Advanced Options. After clicking the Generate button, the download of the archive with the name of your theme will begin.
You can also download the starter theme directly from the GitHub repository – https://github.com/automattic/_s. Once you download the archive, you can install the blank theme on your local WordPress. Once the theme is installed, click on Activate and look at the result.
Now you have a blank slate to work with and you can create a theme yourself.
Installing Unit Test data for a WordPress theme
When creating your own theme, it is very important to consider that the content that users will use on their site will be varied. Luckily, you don’t have to spend a lot of time finding and putting all kinds of content on your site to test out all the options. You can simply download the so-called Unit Test data for WordPress, which includes all types of data that can be placed on the site.
The file can be downloaded from the link: https://codex.wordpress.org/Theme_Unit_Test; you can import this content using standard WordPress tools. Through the menu Tools – Import – WordPress. You will need to install the import plugin and then select the newly downloaded Unit Test file to import. Check the Download and import file attachments checkbox and click Submit:
We wait until the import process is completed, after which you can refresh the site and see that it is now full of posts, pages, comments and other content. Believe me, now you have all possible options for custom posts, different images and markup elements. Be sure that you cover everything in your topic, even posts that have, say, a password-protected picture.
Installing the developer plugin
Agree that during theme development it will be useful if WordPress tells you if something goes wrong. To make this possible, there are a lot of plugins for developers, but as you probably guessed, the main and most powerful plugin is called Developer. It is available from the standard WordPress repository; you can install it in the usual way through the console, in the plugins menu. Now is the time to decide what we need the plugin for and choose one of the proposed options:
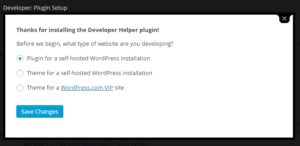
We select Theme for a self-hosted WordPress installation and click Save Changes.
In the plugin settings we can install additional tools for developers, which we will do right now. Select debug bar, debug bar console, cron, extender, then monster widget and regenerate thumbnails, this is enough for now.
Installing and Configuring NetBeans or Other IDE
The final preparatory step is to install suitable development software. IDE or Integrated Development Environment are programs or text editors with advanced functionality, for example, syntax highlighting, debugging, etc. You can use any, but in this course we will use NetBeans to work on the project.
You can always download the latest version for your system from the official website: https://netbeans.org/downloads/. If you are working on Windows, then we will also need the Java environment with which NetBeans works. The complete package is available at: http://java.sun.com/javase/downloads/widget/jdk_netbeans.jsp.
After installing NetBeans, let’s move on to creating and setting up a project. The project is a full-fledged application with which we will work. Click the create project button, select PHP, then PHP Application:
The project will not be limited to just the theme, it will be all WordPress. Therefore, you need to set the path to the folder with your locally installed WordPress. In our case it is C:\wamp\www. Select our catalog and click Finish:
Now we have the entire site in front of us, at a glance. The best thing about using NetBeans or another IDE is that when you press ctrl and hover or click on any function you are using, you can easily get a description of it:
At this point the preparatory work is completed, install the server, a local copy of WordPress and the IDE, after which we will continue (or start) creating our own WordPress theme.